For the final project of the course 24-671 Electromechanical Systems Design course at Carnegie Mellon University, I worked on a team to create a system capable of converting a sewing machine to an embroidery machine. The Embroidotron is designed to convert any standard sewing machine into a computer controlled embroidery machine. Our goal was to make machine embroidery more accessible, hackable, and fun. We set out to easily convert a sewing machine to a CNC embroidery machine without permanent modification and at a moderate cost.
- Primary customers: home sewers, hobbyists, artists/technologists who work with textiles
- Reason: embroidery machines are expensive (>$1000) and users want to be able to continue using their machines to sew as well
- Target specifications: $200 price, no permanent machine modification, 30 min setup/breakdown time, fast operation (~400 stitches per min)
Subsystems
Fabric Positioning System
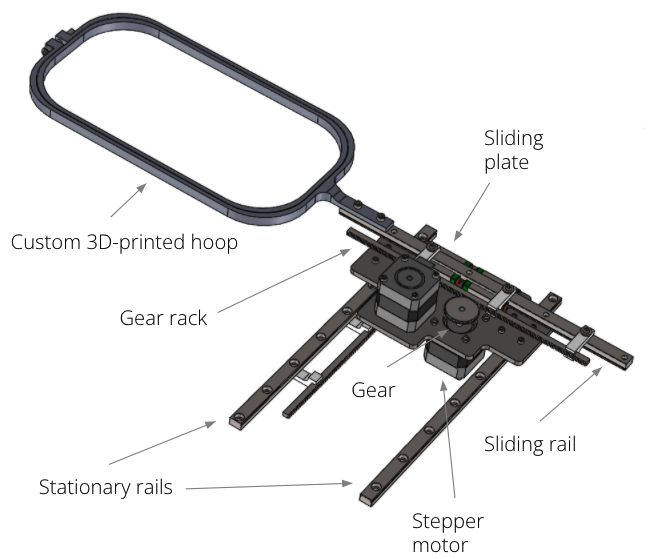
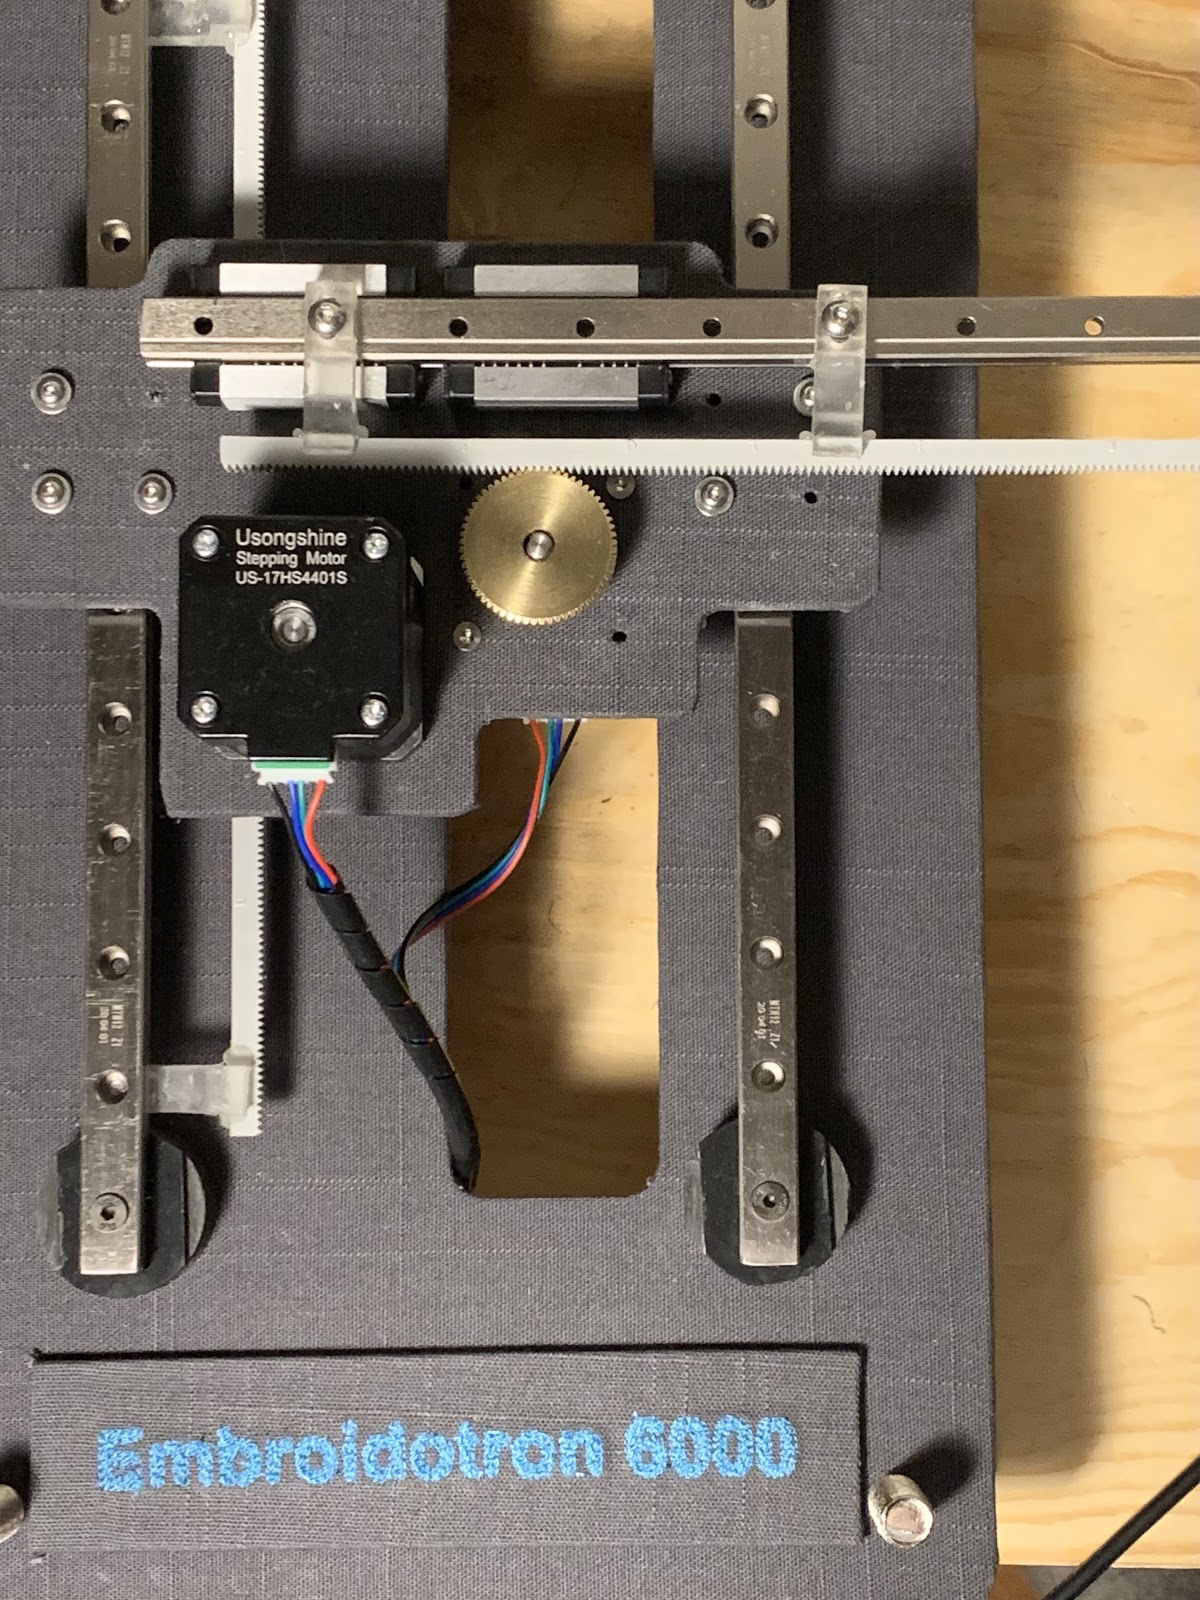
The Fabric Positioning subsystem functions as a 2-axis CNC to control fabric location. As shown in the figure below, the system employs a plate, which slides along two rails which are fixed to the table, and has a rail mounted to it with the hoop fitted to it. Two stepper motors mounted to the plate drive a rack gear fixed to each rail, respectively, which allows for positioning the plate hoop in two axes.
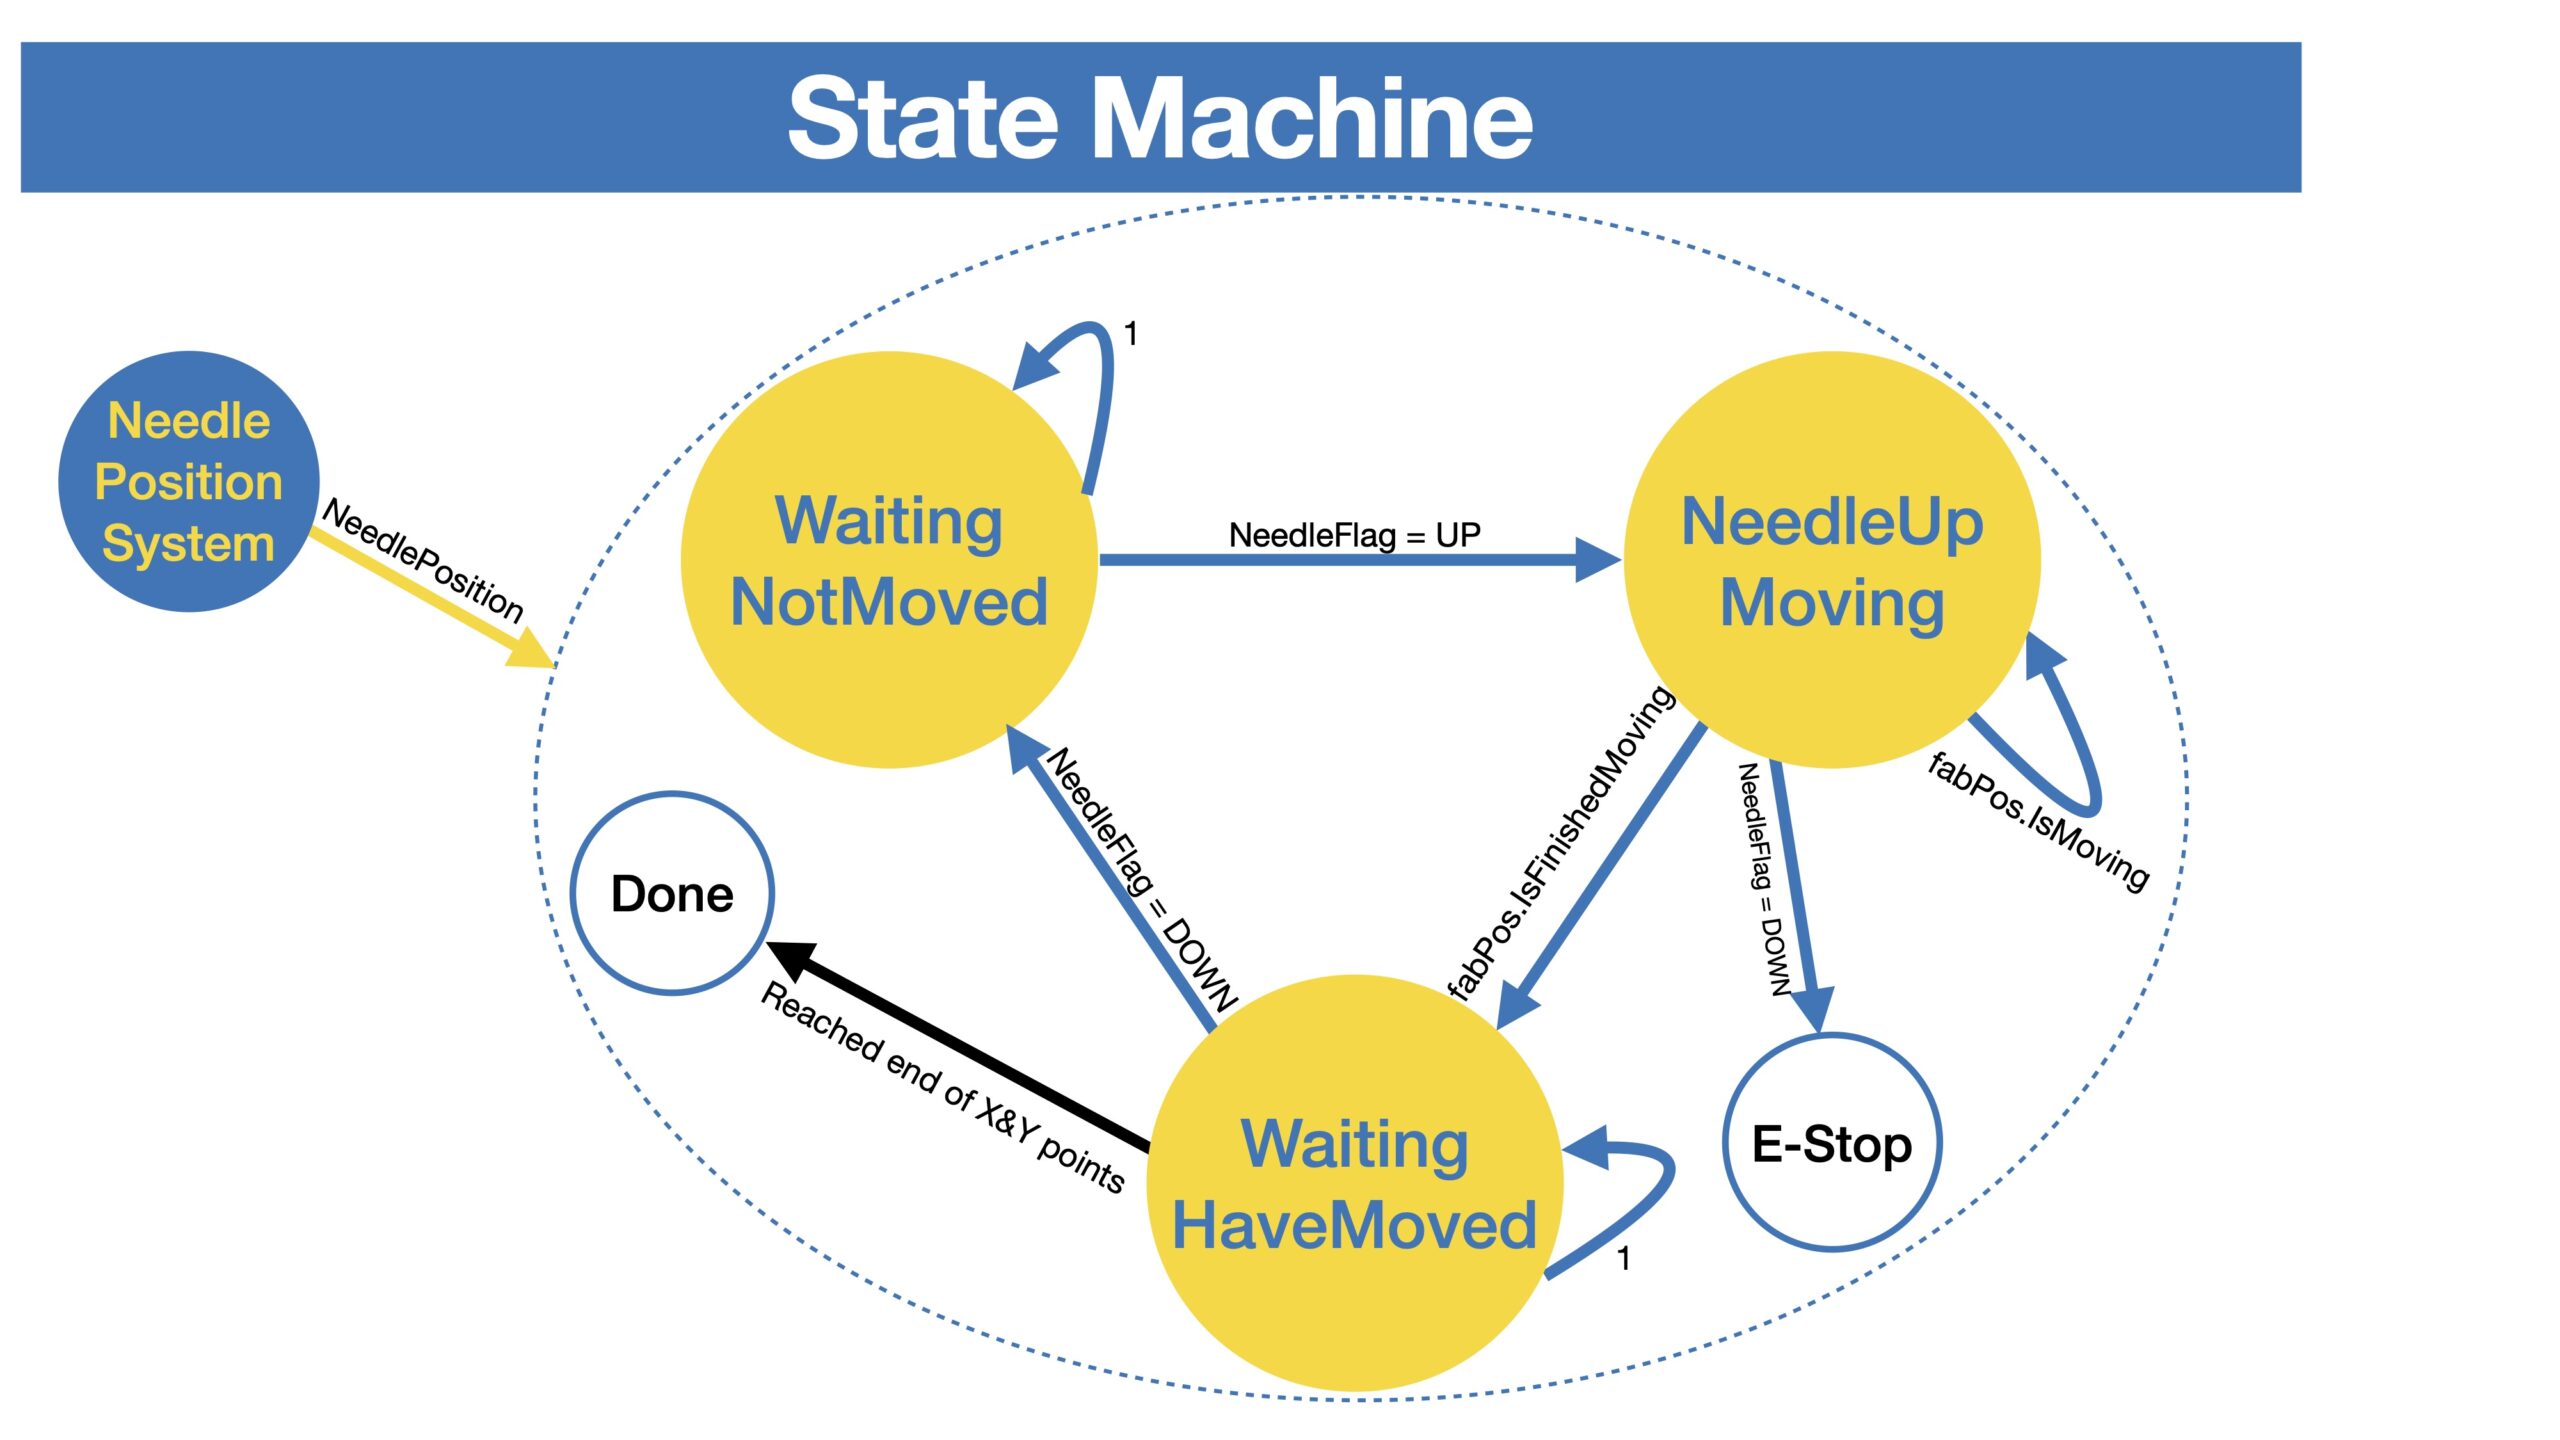
The state machine of the system is shown in the figure below . The three yellow states specify the states used in the Arduino program; the blue state highlights the Needle Position System; and the two white states indicate situations when we stop the machine, on purpose or by accident. As shown in the figure, the Needle Position System sends the position of the needle, measured by the encoder, to the main program. Transition to the Done state takes place when we have successfully gone through all {x,y} points. The E-Stop is accessed when the needle comes down, i.e. needle goes into fabric as measured by the encoder, when the fabric is moving. Transition between the three yellow states depends solely on the position of the needle and whether or not the fabric is moving (i.e. the motors).
Needle Sensor System
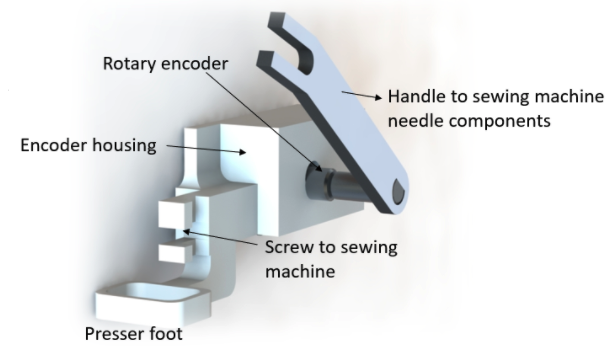
The Needle Position Sensor features a custom foot, which presses the fabric flat to ground surface and also houses a rotary encoder. The figure below shows the critical dimension in this design due to its importance in pushing fabric down. It is not possible to make it too thick, as the foot would put too much force on the fabric and prevent it from moving.
Final Prototype
Our final prototype, shown in Figure 19, was tested on a Singer Heavy Duty. We successfully created an open-source, inexpensive and easy-to-install add-on that can transform any sewing machine to an embroidery machine
-
-
-
- Fabric positioning speed: 400 stitches per min
- Maximum number of possible points: 800 points
-
-
Generating files
The input for our demonstration is a .png file, with white graphics on a black background. PEmbroider, a library from CMU’s studio for creative inquiry, was used to generate .gcode files for our machine.
Passing files to the machine
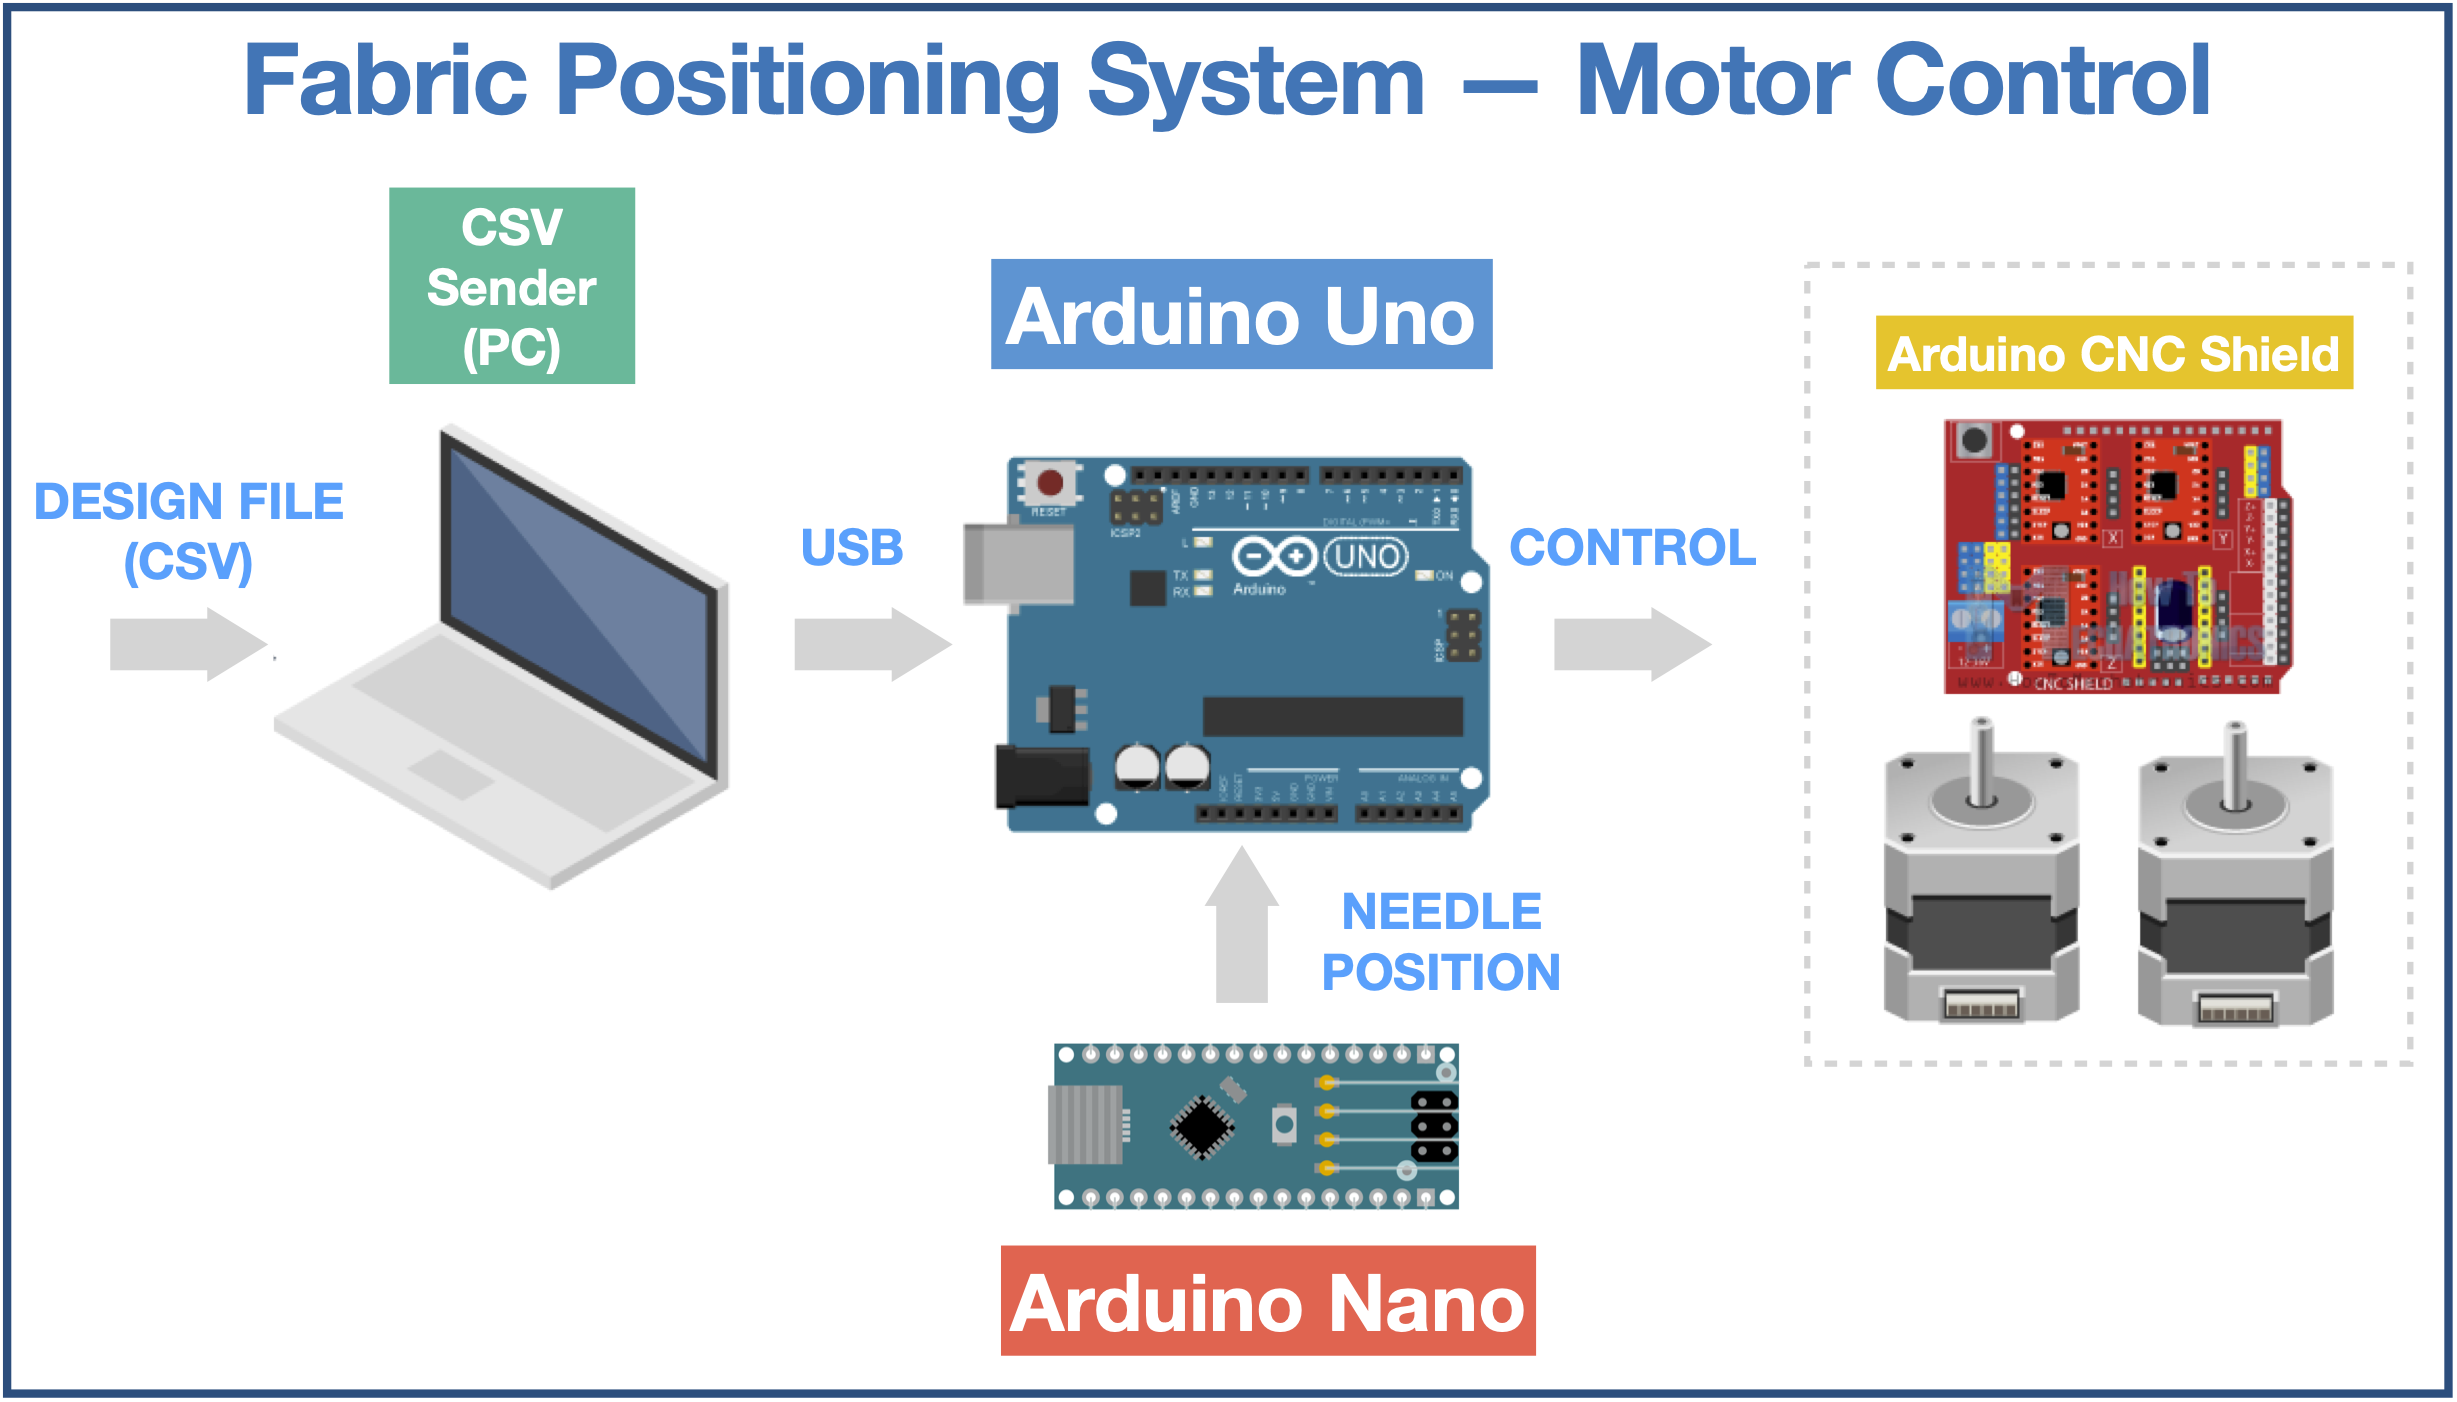
The gcode file was formatted into a string of x,y coordinates for download to the machine.
Running Embroidotron
Once the file is on the machine and the needle is calibrated, we turn on the motors, push down on the petal and the machine will step through the points as the needle comes out of the fabric. We had to be careful to go slowly for any file that had excessive travel between needle downs.
Results
The final prototype was able to successfully move the fabric hoop everytime the needle was clear of the fabric, achieving a stitching rate of 400 stitches-per-minute. The Arduino code I wrote successfully parsed through a buffer receiving the next positions from the python script running on the computer side.